Although the majority of OScript run by Content Server comes from OLL files: the option to patch existing code in an OLL is available. The patch process involves creating a patch file which overrides feature(s) in object(s) as you desire. To create a Content Server patch file you need to perform the following three steps:
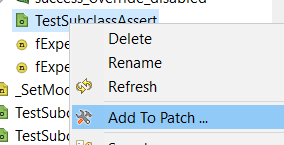
To start: right-click the feature or object you wish to patch in the Module Explorer (not the OScript Explorer) and select "Add To Patch ..." from the contextual menu:

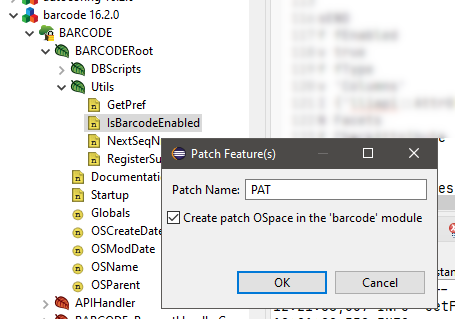
This brings up a dialog that allows you to enter the name of the patch and specify whether the resultant patch OSpace is created in the same module as the object getting patched. If this option is not selected the OSpace is created in the 'core' module:

Note that the patch name simply dictates what the name of the generated patch file will be. The module selected for creation has no impact on the file contents either.
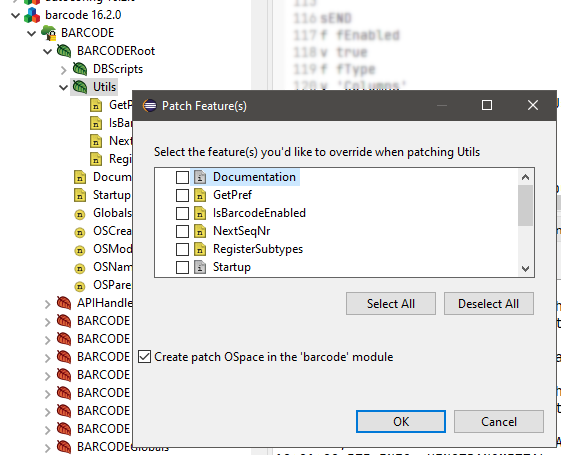
If the element that was selected in the Module Explorer was an object you also have the option to select the feature(s) of the object that you would like to override in the patch:

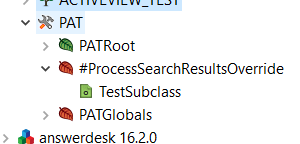
Once the feature(s) have been marked for patching: a patch OSpace will exist with the patched objects as orphans, and the features of interest overridden:

Note that you can repeat this process as often as you'd like before continuing - each patch can house multiple objects / features. Additionally: you can have multiple patch OSpaces open at the same time
Stating the obvious: the patch should introduce logic changes to the overridden features. You will want to make these modifications before continuing to the next step.
Right-click the patch OSpace you wish to generate the file for and select "Generate Patch File". This will result in a patch file named "ospaceName.pat" in the home directory of your Content Server instance. This patch can then be applied to any running system in the same manner as any other patch file (i.e: place the "ospaceName.pat" file in the "patches" folder of your Content Server installation (note that this folder is not created on installation; it's possible that you will need to create this folder manually).