Creating a Project
The Project Creation Wizard defines both the location where you will create OScript source files and the connection to your installed Content Server instance.
Start the wizard by clicking "New > Project" from the top-level Eclipse File menu.
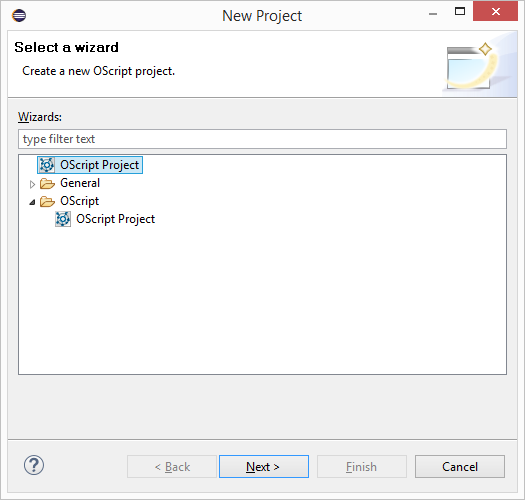
Select OScript Project from the OScript folder and click Next.
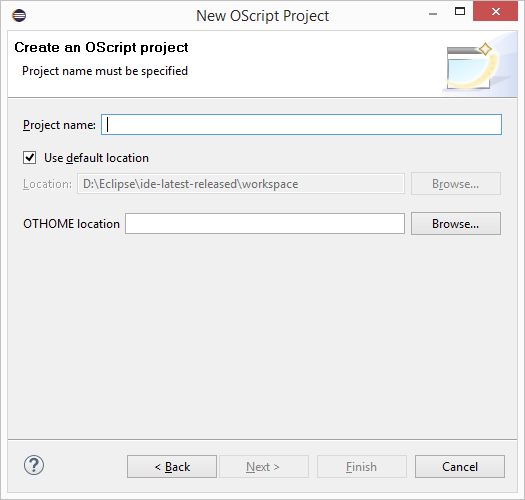
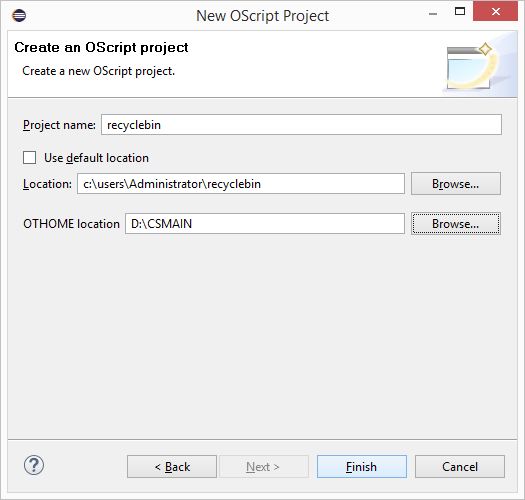
The project name and location can be anything you like. The project location will be where your source code is stored. A subfolder called "srcmodules" will be created where your source will be exported.
You can accept your workspace as the default project location, or use the Browse button to provide a new location.
If you already have OScript source in the .os file format in a folder called "srcmodules", you can select the srcmodule folder's parent folder and your source will be automatically imported into your project.
The Content Server directory (OTHOME) is the folder containing your Content Server installation.
Click Finish.
Your project will be created and Content Server will start up.
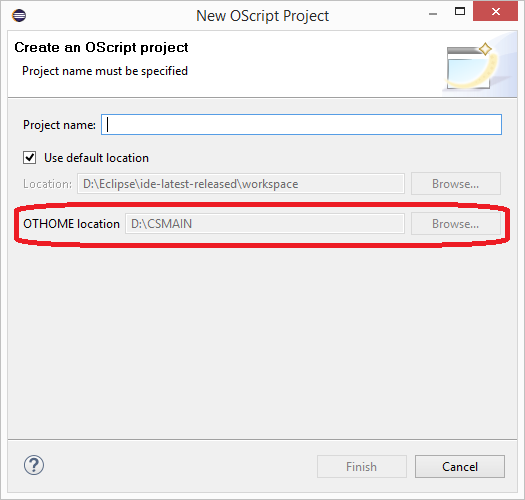
Starting with the 16.2.2 release, a workspace can be attached to a single server project only. Each new source project will have the server project field greyed out with the existing OTHOME of that server selected. Your workspace will be checked if multiple servers are defined and you will be notified to fix this through the Eclipse Error Log view. You will be also notified if your source project is associated with a server that no longer exists.
Project Layout
Two projects are created by the New OScript Project wizard. The first project (for example, "MyModule") has the name you provided in the Project field. That project is your "source project." It contains the srcmodules folder which will contain your OScript source code.
The second project (for example, MyModule_server) is your "server project." It contains the link to the OTHOME folder you specified.
A source project can contain multiple modules, but you can also create additional projects to separate code bases. When creating additional source projects, create the projects as before, specifying the same Content Server directory as you did for the first project.
Import your Module
To convert a module created for Content Server 10.0 or earlier to the new source format, you must first install the module.
In Eclipse, select "File > Import" from the main menu.
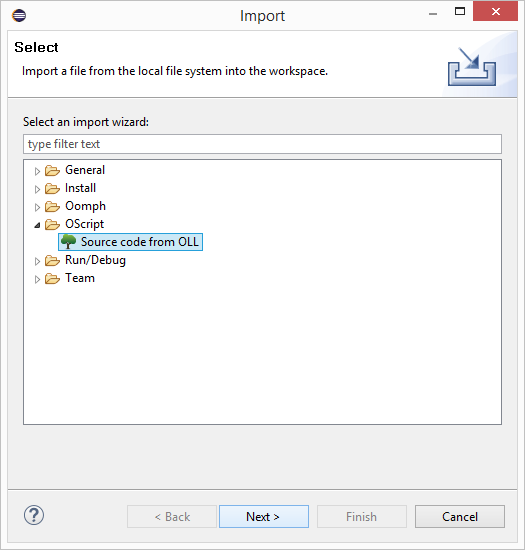
Under "OScript" select Source code from OLL and click "Next."
Select your modules from the list by checking the checkboxes beside them.
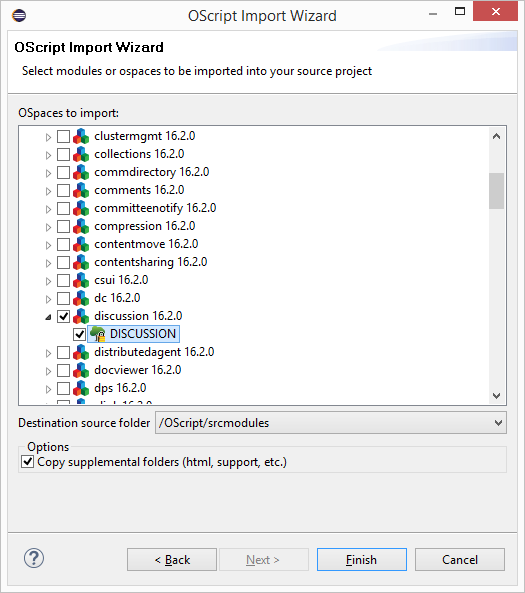
Selecting "Copy supplemental folders" will copy the files from your module folder in your server’s install directory to your source tree, which is helpful for placing those files under version control. Note you will need to copy those files back to your OTHome module folder if you make any changes.
Click "Finish."
The new source code for your module has been exported to the “srcmodules” folder in your source project specified by the Import dialog.
NOTE: This process overwrites any existing source code at that location, so modules should be exported more than once only in exceptional circumstances.
Building a module from source is the only way to push changes from the source files into your OLLs. From that point on, to make a permanent change to an OSpace, you should modify the .os file and compile the changes. Modifying an object using the Module Explorer has no effect on the exported source files.
The import automatically performs a full build. If there are no problems, the module should be successfully imported at this point.
If the import does encounter problems, you will need to manually fix the source files. The Problems View (Select "Window > Show View > Problems") is helpful in finding compile errors. After you make the fixes, you must perform a clean build so that all files are re-examined and parent-child relationships are properly established.
Creating New Modules
To create a new module, do the following:
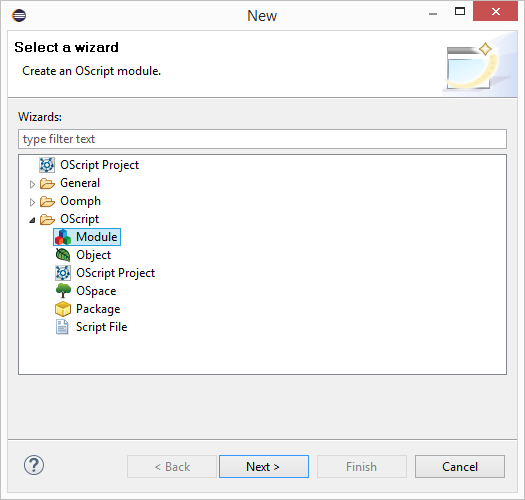
Select File > New > Other... from the top-level menu. Select Module from under the OScript category. Click Next.
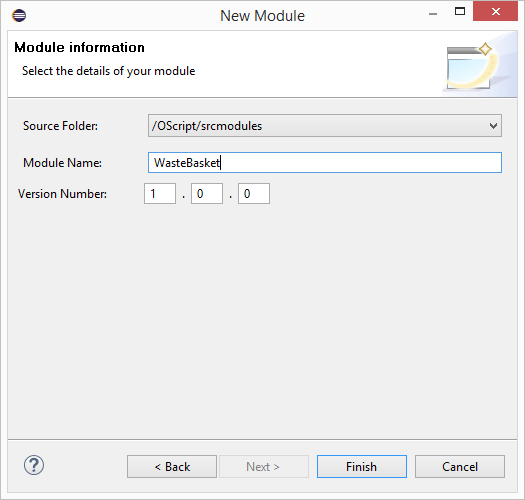
On the New Module dialog box, enter the name of the new module (a primary OSpace will be created with the same name as well for that module) in the Module Name box. You can also set the version number. Note that the module name can only contain letters in the English alphabet (A/a to Z/z)
The module's primary ospace is loaded, giving you the opportunity to make whatever changes you'd like to make before installing your new module.
Once you're ready, restart Content Server and install the module as normal.
Creating a New OSpace
To create a new OSpace in a module, do the following:
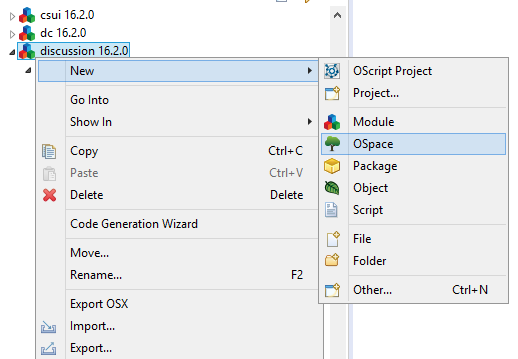
Right-click the module in the OScript Explorer, and then click New OSpace.
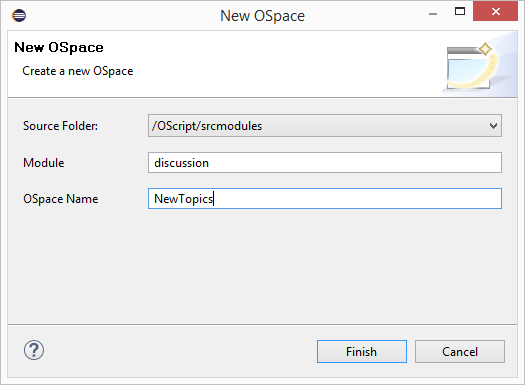
Specify the name of the OSpace in the OSpace Name box.
Creating a New Package
Packages are a new feature in OScript which allow you to organize your source code. To create a new package, do the following:
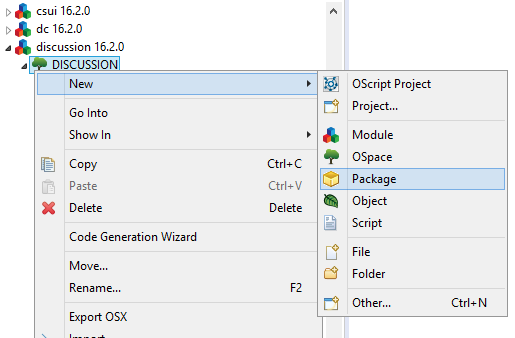
Right-click its parent package (an OSpace may be selected as a parent package) and then click New Package.
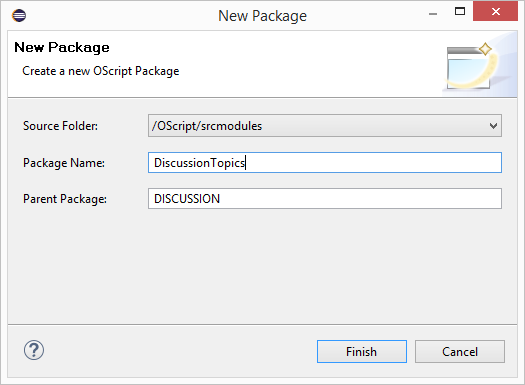
Specify the name of the package relative to its parent in the Package Name box.
Creating a New Object
To create a new object, do the following:
Right-click a parent object or a package, and then click New Object.
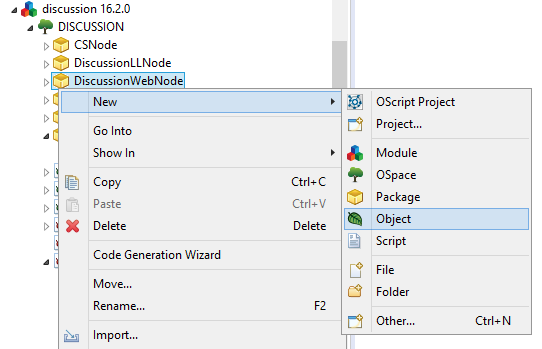
In the New Object wizard, specify the object name in the Object name box. If you select a parent object, specify a fully-qualified package name in the Package box. If you select a package, specify a fully-qualified object name in the Parent object box.
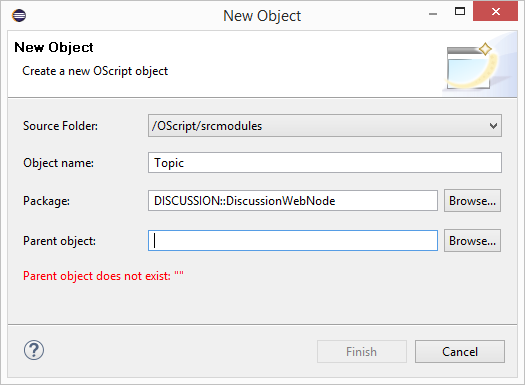
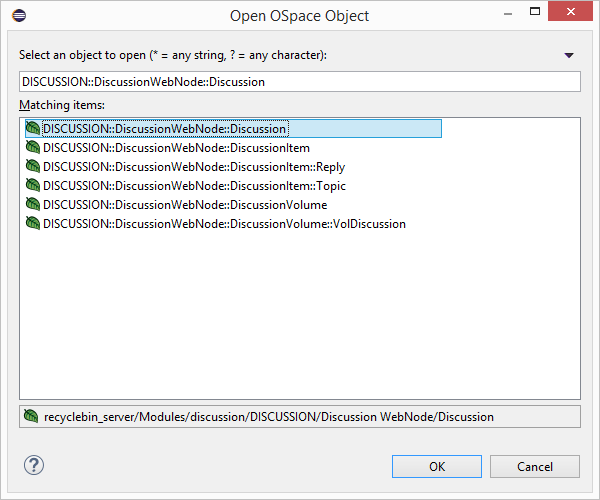
The "Browse" button helps you fill in whichever field the wizard wasn't able to fill by the context. Start typing the name of the parent object or package and it will appear in the list.
Creating Script Files
Ad hoc scripts can be used for testing and debugging content server and running automated tasks. To create a script, do the following:
Select File > New > Script File from the top-level menu.
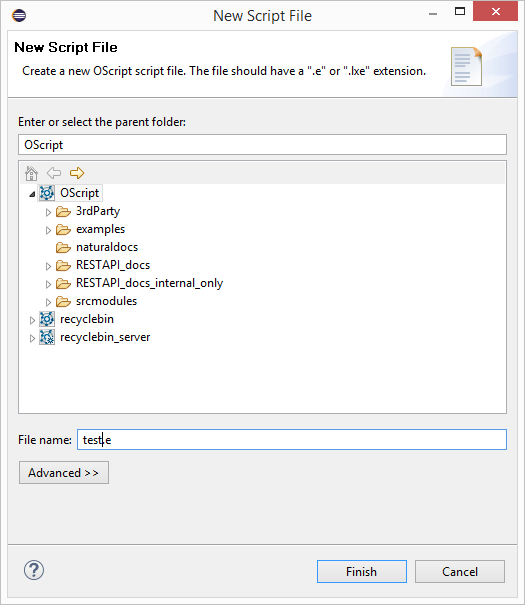
Choose a location to save the script file and click Finish.


